Monday, December 21, 2009
Googily!
Saturday, December 19, 2009
Others excellence
Anyway, thanks to that site, and many others, I have bookmarks coming out of my virtual ears. I have lists of things to make to keep me busy for years.
Here are a few, high on the list:
This felt circle pillow from Presser Foot is so cute and is something I think people would actually want on their couch.
Or how about these cute pouches from Noodlehead. While you're there check out the camera case too.
There you go. Nothing from me, but some great stuff from others. Can I assume that all your crafting is wrapping up (ha ha) at this stage too? Or are you crafting up to the last minute?
Friday, December 18, 2009
Book-spiration
But! In my pile of fresh library books were these two gems:
Wednesday, December 16, 2009
Argh Matey! Nautical pillows
I love the Odyssea fabric, for Moda. It's such a fun, aquatic theme.
Monday, December 14, 2009
How did I live?
Here's a little onesie I whipped up for my new nephew Jack.
Saturday, December 12, 2009
A little purse for a little girl
This purse is decidedly girly and young-ish, so hopefully she won't see it, roll her eyes and ask where her Fendi is.
Thursday, December 10, 2009
My easy toddler mittens
If you're anything like me you have kids (me = 2 boys, 3 1/2 and 1 1/2) or know someone with kids. If you're like me you live in the northern part of the world where winter is a chilly, snowy reality. Also, if you're like me your children lose mittens like crazy. Or lose just one of the mitts.
Winter is enough of a pain without spending time searching for mittens. My solution was to make a bunch, all the same, so that we're never short.
You don't need much fabric for this; I've found fleece remnants and even made some out of this great thrifted felt I found at Goodwill for a steal!
Here is how I go about it:
Step #1:
Make a template. I used some cereal box cardboard and an existing mitt. (The only one left of the pair... imagine that!)
Here are my template measurements, to give you an idea:
6 1/4" cuff to top
3" across the finger area
2 1/2" wrist width
3 1/4" cuff width
2" approx. thumb length
This size fits my 3 1/2 year old and my 1 1/2 year old.
You can see the template's shape in the first photo.


Don't sew up the bottom!
 Step #5: Now you should have a bunch of sewn up, soon-to-be mitts.
 Step #6: Cut out the mitts. I cut quite close to the stitches so that there aren't bulky seams when it's turned inside out. It's really important to snip the space between the thumb and finger area, or it will pucker when turned inside out. Just don't cut the stitches. I also snip the corners at the bottom just a little so they won't hang out.
 Step #7: Turn right side out. You may need to use a poker (pencil, chopstick, etc) to get the thumb turned out. Don't use anything too sharp or you'll rip the seam and have to turn the whole thing inside out again to fix it!
 The end! Again, if you're anything like me, you'll make a big stack to keep or give away. They are super quick to make. I made this bunch in 30 minutes from start to finish. (That was with taking picture too!).
 You can see from the photos that I don't even bother hemming the bottoms, because fleece don't fray and can be cut cleanly. By all means, if you are more patient and have more time than me, hem away! Also, it goes without saying that these could be decorated with ribbon, trim, applique, etc. I would do that in the early steps, because they are sewn together, because there's no getting a hand into these babies once they're sewn up.
Here's the bunch that I first made. They've been in constant service for a few weeks now. I'm sure I've lost a few along the way, but with 12 mitts, I should be good for a while.
That's the tute. Hope it helps at least one of you survive the Mitten Madness a little easier.
Winter has arrived full-force here in our temporary home of Montana, and back in our real home, Ottawa. Might as well accept that we have 4 months of mitts ahead of us.
Reusable Lunch bag, with beaver
I looked through my fabrics and found a thrifted man's shirt that fit the bill. But what to do with it?
Well, everyone needs to eat, right? So using the great tute from The Purl Bee I made him a lunch bag.
Here it is:


The B3 = Brian's Beaver Bag.
I used Heat 'n Bond to secure the brown fabric. One suggestion would be to remember to do the work on the front panel (be it applique, embroidery, etc) before you start to assemble the bag. That way, you won't see the stitches on the inside when you're done. (Of course, this only applies if you use a lining, which I did).
I'd love to see any bags you guys come up with.
So busy here. We're packing up, having been away from home for the last 4 months, and we're heading back home in 6 days. Must stop sewing and start preparing.
Later!
Tuesday, December 8, 2009
Monday, December 7, 2009
Lil' Stuffie

I'm back and I've been busy!
I'm really proud of some of my creations. I haven't really spent any time over the last few years crafting. Having boys, back to back, eliminated that possibility. But, now that they are older and going to bed (and actually sleeping) I find myself in a position where I have both the energy and desire to start up again.
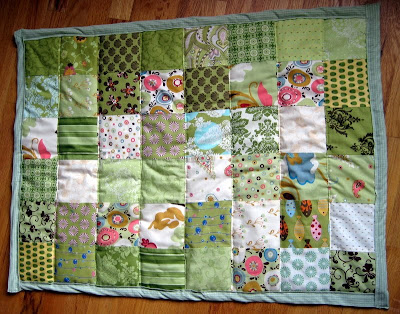
First up is a quilt that I made for a friend's baby. They are actually friends of my husband, who I have never met, but it was this friend's mom who lent me the sewing machine I've used while in Montana, so I thought I'd make a present for lil' Molly, who's only a few days old now.
I used Moda's Authentic fabric, which I think is one of my favourite collections ever. It's certainly non-traditional for a baby quilt, but I love it and think it suits the baby of writers just perfectly.

Tuesday, November 17, 2009
Bibs and bits


Above are two of my denim bibs, inspired by thimbly things great post. My bibs are destined for a niece (a bit girly for my boys, dontcha think?). They have been named the "Audrey" bibs, because I decided they're what Audrey Hepburn would have worn, bib-wise, had she had a choice in toddler-hood.
Saturday, November 7, 2009
I keep saying this...
 Beautiful. Nice work, Cluck Cluck! I'm thinking the the Moda Arcadia fabric would be soooo dreamy with this Fall theme:
 Of course, this is a big step above my thrifty, recycled material-norm. I just love that fabric so much.
In other projects:
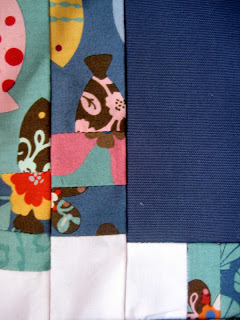
Work on the Berkie quilt (soon to be new niece or nephew) is almost done. I obviously haven't pressed it yet... gee can ya tell? If there's any doubt of my newbie-ness, it will be banished when you see these. I just tell myself that I get better every project.

 The fabrics are mostly from Moda Hushabye and Moda Odyssea. Beau-ti-ful.
I'm also hard at work on my thimbly-things inspired denim bibs. This one was a 'practice bib' so there isn't any decoration on the front. I love how they look and they certainly seem sturdy and washable.


